Solidity Smart Contract for a Crowdfunding Campaign

This article will show you how to implement and deploy a smart contract for a crowdfunding campaign use case. The idea of crowdfunding is a process of raising funds for a project or venture from the masses. Investors receive tokens that represent a share of the startup they invested. The project sets up a predefined goal and a deadline for reaching it. Once a project misses the goal, the investments are returned, which reduces the risk for investors.
This decentralized fundraising model can supplant the fund need for startup, and there is no need for a centralized trusted platform. Investors will only pay the gas fees if the fund returns. Any project contributor gets a token, and they can trade, sell, or keep these tokens. In a certain stage, the token can be used in exchange for real products as the physical reward.
Start by defining struct and events, shown as follows:
pragma solidity ^0.4.24;

contract CrowdFunding {

    Project public project;
    Contribution[] public contributions;
    //Campaign Status
    enum Status {
        Fundraising,
        Fail,
        Successful
    }
    event LogProjectInitialized (
        address owner,
        string name,
        string website,
        uint minimumToRaise,
        uint duration
    );
    event ProjectSubmitted(address addr, string name, string url, bool initialized);
    event LogFundingReceived(address addr, uint amount, uint currentTotal);
    event LogProjectPaid(address projectAddr, uint amount, Status status);
    event Refund(address _to, uint amount);
    event LogErr (address addr, uint amount);
    //campaign contributors
    struct Contribution {
        address addr;
        uint amount;
    }
    //define project
    struct Project {
        address addr;
        string name;
        string website;
        uint totalRaised;
        uint minimumToRaise;
        uint currentBalance;
        uint deadline;
        uint completeAt;
        Status status;
    }
    //initialized project
    constructor (address _owner, uint _minimumToRaise, uint _durationProjects,
        string _name, string _website) public payable {
        uint minimumToRaise = _minimumToRaise * 1 ether; //convert to wei
        uint deadlineProjects = now + _durationProjects* 1 seconds;
        project = Project(_owner, _name, _website, 0, minimumToRaise, 0, deadlineProjects, 0, Status.Fundraising);
        emit LogProjectInitialized(
            _owner,
            _name,
            _website,
            _minimumToRaise,
            _durationProjects);
    }
Now, define modifiers as shown in the following code:
   //check if project is at the required stage
    modifier atStage(Status _status) {
        require(project.status == _status,"Only matched status allowed." );
        _;
    }
    //check if msg.sender is project owner
    modifier onlyOwner() {
        require(project.addr == msg.sender,"Only Owner Allowed." );
        _;
    }
    //check if project pass the deadline
    modifier afterDeadline() {
        require(now >= project.deadline);
        _;
    }
    //Wait for 6 hour after campaign completed before allowing contract destruction
    modifier atEndOfCampain() {
        require(!((project.status == Status.Fail || project.status == Status.Successful) && project.completeAt + 6 hours < now));
        _;
    }
Define smart contract functions as follows:
   function () public payable {
       revert();
    }

    /* The default fallback function is called whenever anyone sends funds to a contract */
    function fund() public atStage(Status.Fundraising) payable {
        contributions.push(
            Contribution({
                addr: msg.sender,
                amount: msg.value
                })
            );
        project.totalRaised += msg.value;
        project.currentBalance = project.totalRaised;
        emit LogFundingReceived(msg.sender, msg.value, project.totalRaised);
    }
    //checks if the goal or time limit has been reached and ends the campaign
    function checkGoalReached() public onlyOwner afterDeadline {
        require(project.status != Status.Successful && project.status!=Status.Fail);
        if (project.totalRaised > project.minimumToRaise){
            project.addr.transfer(project.totalRaised);
            project.status = Status.Successful;
            emit LogProjectPaid(project.addr, project.totalRaised, project.status);
        } else {
            project.status = Status.Fail;
            for (uint i = 0; i < contributions.length; ++i) {
              uint amountToRefund = contributions[i].amount;
              contributions[i].amount = 0;
              if(!contributions[i].addr.send(contributions[i].amount)) {
                contributions[i].amount = amountToRefund;
                emit LogErr(contributions[i].addr, contributions[i].amount);
                revert();
              } else{
                project.totalRaised -= amountToRefund;
                project.currentBalance = project.totalRaised;
                emit Refund(contributions[i].addr, contributions[i].amount);
              }
            }
        }
        project.completeAt = now;
    }
    function destroy() public onlyOwner atEndOfCampain {
        selfdestruct(msg.sender);
    }
Use Remix to test your campaign. Select the JavaScript VM option.
- Initialize the campaign by clicking on the
Deploybutton with the following input. This will start your campaign by means of the call constructor. Assign the first account as the project owner. The minimum funds raised is 30 ether, deadline set to five minutes for testing purposes. Put the following input code in the text box beside theDeploybutton. Here are input parameters for the constructor:The following is the screenshot for the Remix editor screen for this step:0xca35b7d915458ef540ade6068dfe2f44e8fa733c, 30, 100, "smartchart", "smartchart.tech"
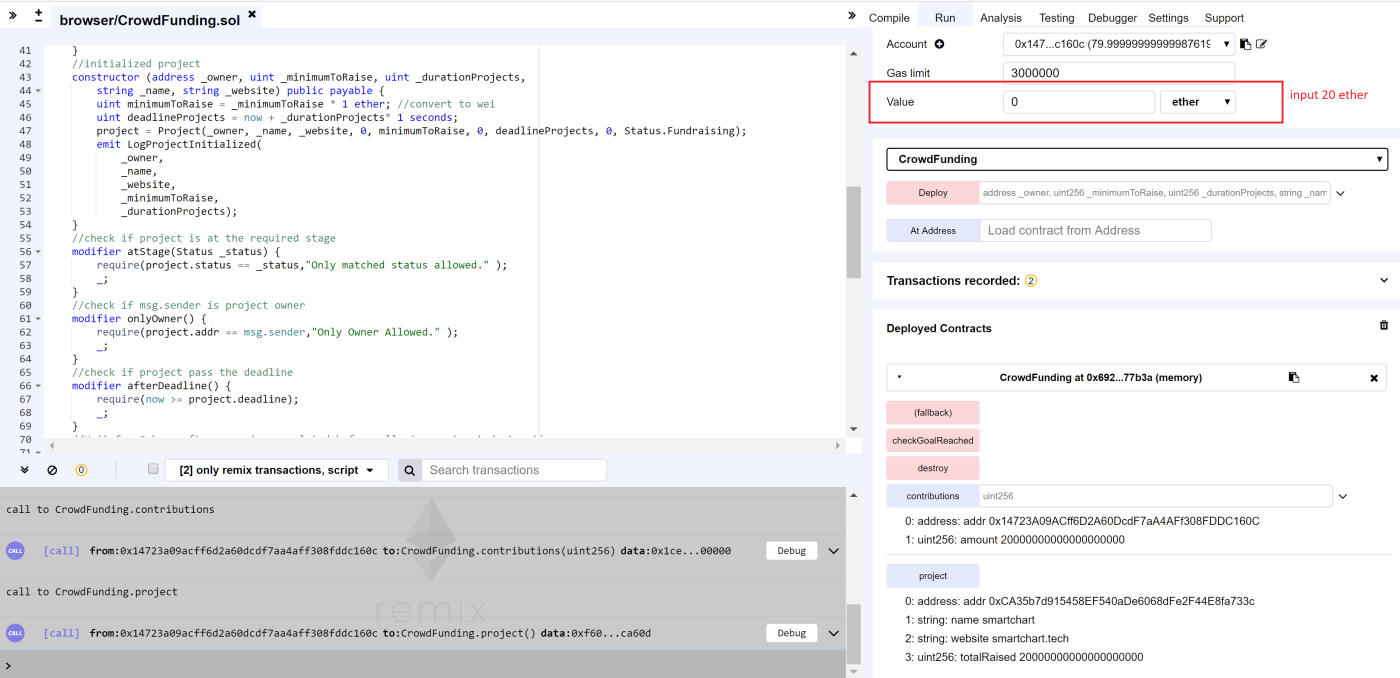
- Switch to the second account and in the Remix value input field, enter 20 ether and then click on the (fallback) button. This will add 20 ether to totalRaised. To check project information, click project button, and you should see that the totalRaised is 20 ethers now. Enter 0 uint in the contributions input field, and you can a see second account contribution address and a fund amount of 20 ethers:
- Switch to the third account, enter
15ethers in theValuefield to add funds for the project. Click on (fallback), and you can see the project total fund raised to35ethers. At this moment, the project has achieved the campaign goal: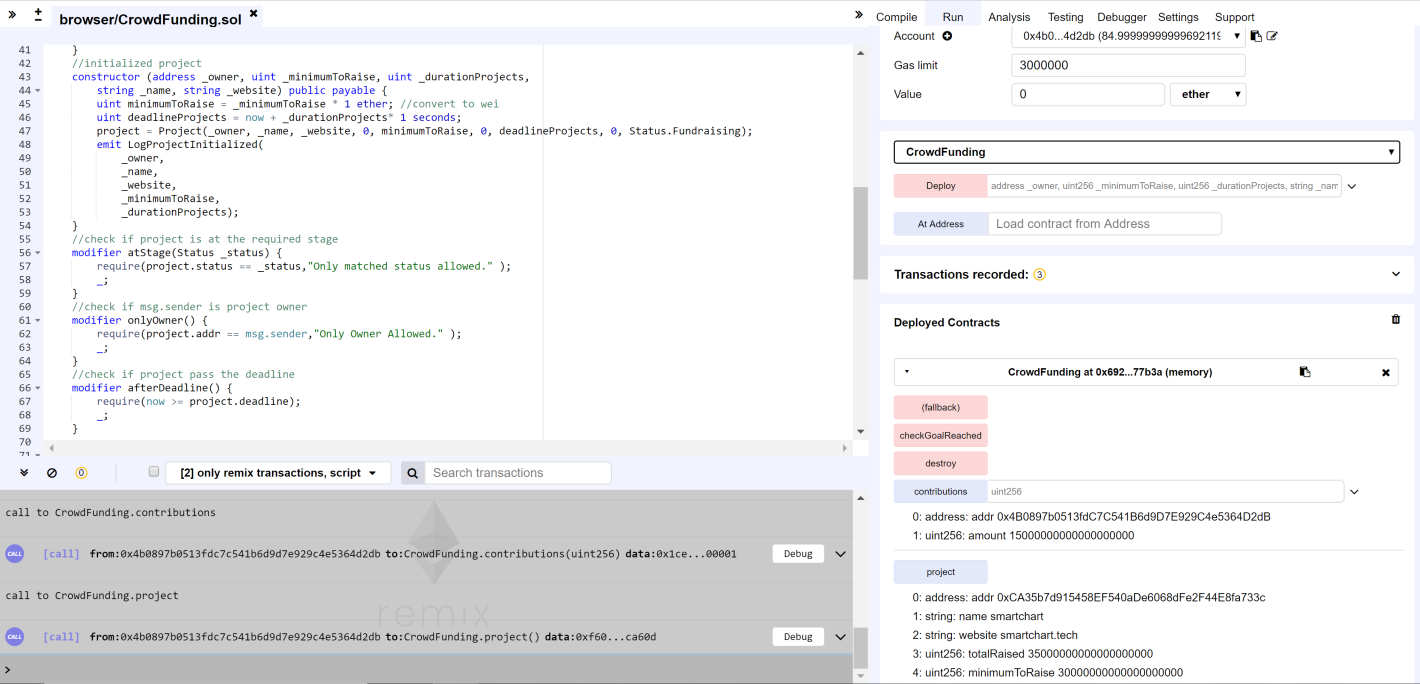
- Switch back to the project owner, which is the first account, and click on
checkGoalReached. You can see that the transaction has been successfully executed. In the logs, the project status is updated to "successful".LogProjectPaidis triggered. If you check Remix account 1, 2, 3, the project owner account now contains a total in the region of 135 ethers. Your campaign smart contract was successfully tested in Remix: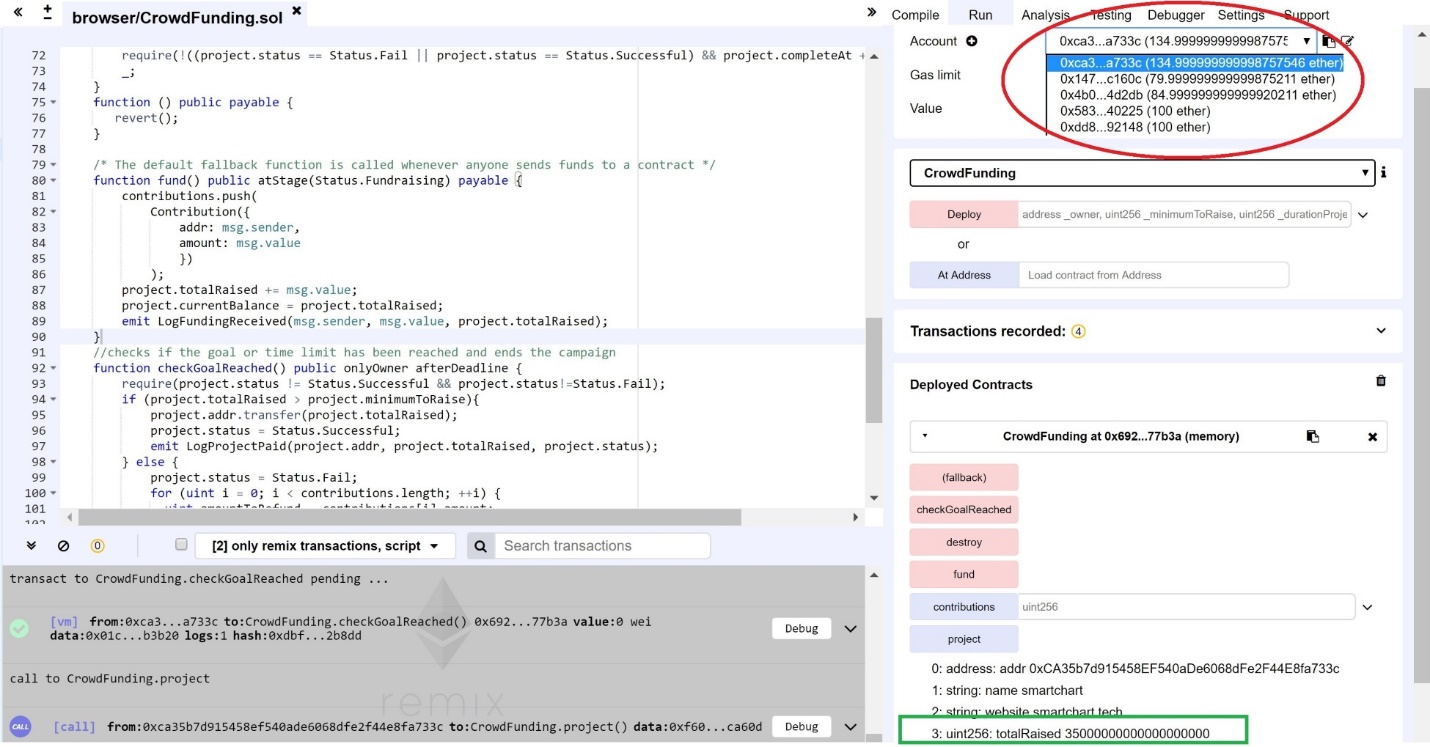
Deploying the smart contract
When you add a new contract and deploy the contract, the number of the last deployment in stores will increase. After the contract has run once, it will not run again. The numbering convention is x_script_name.js, with x starting at 1, that is 1_initial_migration.js. Your new contracts would typically come in scripts starting at 2_....
In this case, you’ll add a new migration contract to deploy CrowdFunding. Create a file called 2_deploy_contracts.js. CrowdFunding.sol defines the constructor as follows:
constructor (address _owner, uint _minimumToRaise, uint _durationProjects,
        string _name, string _website)
To deploy a contract, with optional constructor arguments, you can call the truffle deploy function, deployer.deploy(contract, args..., options). Use Ganache as the owner account, as follows:
var CrowdFunding = artifacts.require("./CrowdFunding.sol");
module.exports = (deployer, network, accounts) => {
  const ownerAddress = accounts[0];
  deployer.deploy(CrowdFunding, ownerAddress, 30, 60, "smartchart", "smartchart.tech");
}
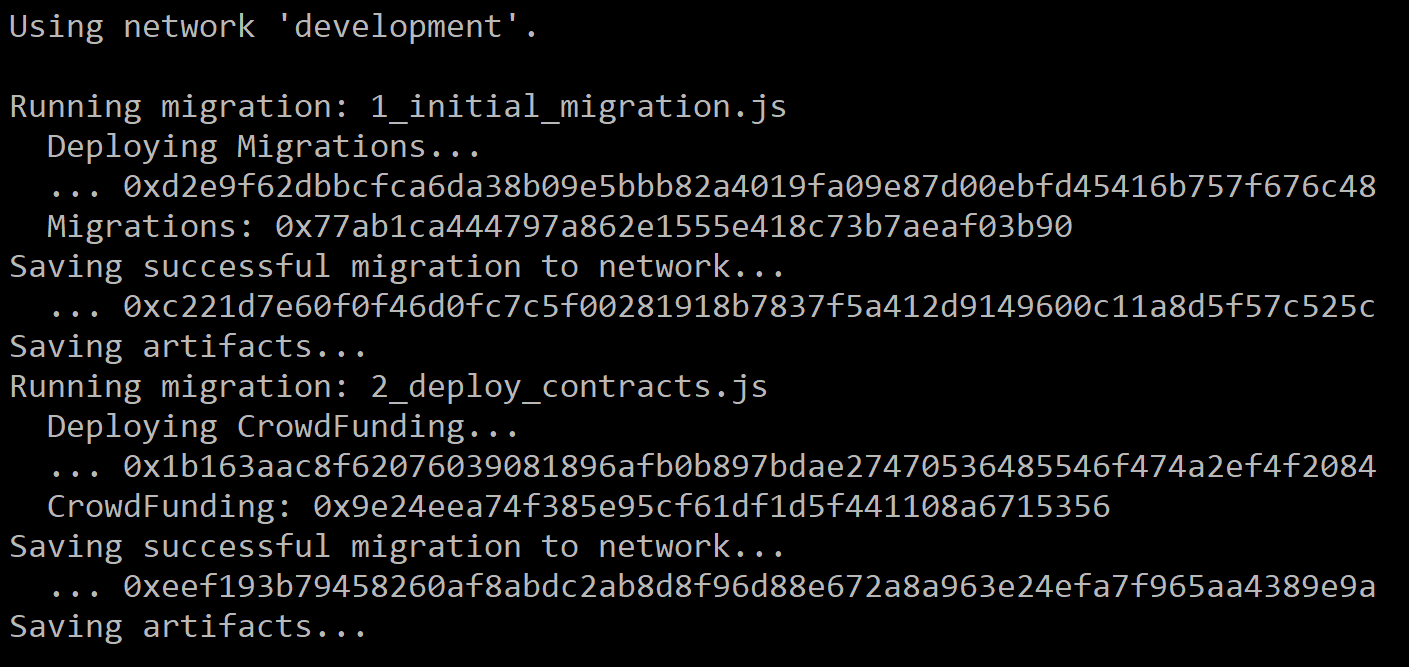
Now, deploy the smart contract to your network. Run the truffle command, as follows:
truffle migrate
The following screenshot displays the result for running the command for truffle migrate:
This deploys your crowdfunding smart contract in a local Ganache blockchain environment. To bring your local node server up, run the following command, which will bring up the pet store page in your browser:
npm run dev
If you found this article interesting, you can explore Blockchain Quick Start Guide to learn quick and effective techniques to get up and running with building blockchain including Ethereum and Hyperledger Fabric. Blockchain Quick Start Guide will give you a thorough overview of blockchain and make you comfortable working with basic blockchain frameworks and develop secure, decentralized applications in a hassle-free manner.